Tel: +86 15262904857 E-mail: overseas@jsbaileybridge.com
- All
- Product Name
- Product Keyword
- Product Model
- Product Summary
- Product Description
- Multi Field Search


Views: 0 Author: Site Editor Publish Time: 2026-07-14 Origin: Site


For critical infrastructure and temporary access projects, bridging the gap between site constraints and payload demands requires a highly calculable, verifiable solution. You need structures capable of immediate deployment. They must handle massive machinery without buckling. Evaluating a structural solution requires balancing clear-span capabilities against heavy-duty load compliance. You must achieve this without escalating project timelines. Remote construction sites often lack accessibility for traditional bridge building. Disaster relief operations demand immediate logistical pathways. A detailed technical analysis reveals the specific operational envelope of these modular systems. We will explore their structural configurations, material science, and implementation realities for decision-makers. You will learn how to align complex truss arrangements with exact span requirements.
The Compact 200 (CB200) supports single-span lengths up to 60.96 meters (200 feet) depending on the truss configuration and target load class.
Load capacities align with major international standards (e.g., AASHTO HS20/HS25, Eurocode), accommodating both standard commercial fleets and heavy tracked equipment.
Selecting the correct truss configuration (from Single-Single to Triple-Double with reinforced chords) is the defining factor in balancing dead weight against required live load capacity.
Successful implementation requires rigorous pre-launch engineering, particularly regarding foundation bearing pressure and cantilever launch limits.
Standard legacy systems often fall short under modern industrial loads. Engineers typically contrast the newer CB200 models against standard CB100 variants. The CB200 offers a significantly increased panel height of 2.134 meters. This taller geometry improves overall shear capacity drastically. It provides wider roadway clearance for oversized construction vehicles. You gain a broader operational envelope for varied traffic. Wider clearances prevent accidents during heavy equipment transport.
Material specifications define structural endurance. Modern manufacturers utilize Q345B, Q345C, or equivalent high-yield steel grades. This transforms the assembly into a highly reliable high strength Bailey bridge. High-yield steel resists dynamic fatigue effectively over decades. It accommodates constant heavy traffic. These steel grades offer superior tensile strength. They perform exceptionally well across extreme temperature fluctuations.
Several success criteria make this modular system a viable choice. Rapid deployment stands out immediately as a core advantage. Assembly teams construct them without requiring intermediate river piers. You bypass complex underwater foundation work entirely. Engineers predict deflection curves precisely using standardized load tables. This predictable performance ensures structural safety across diverse environments. Predictability reduces risks during the critical commissioning phase.
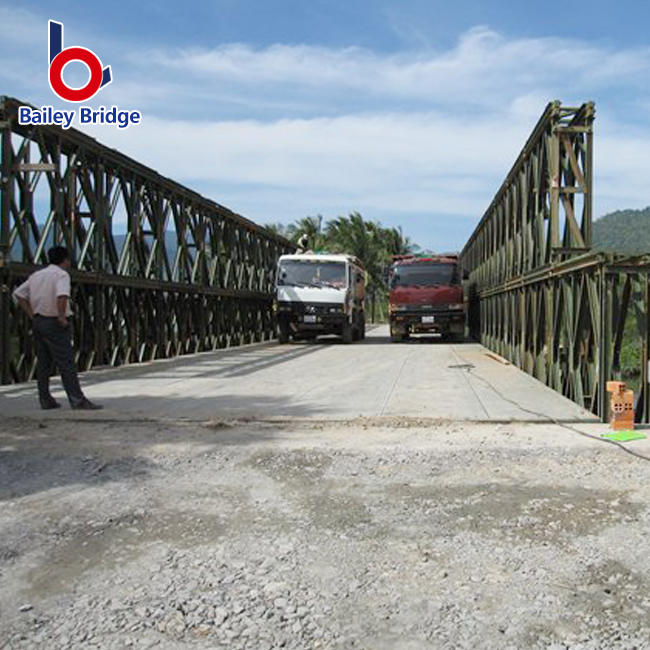
Adding truss panels dictates your maximum unsupported span. You can arrange them side-by-side or stack them vertically. This configuration matrix defines ultimate load thresholds. Engineers must match the matrix to site dimensions carefully. The arrangement directly influences the bending moment capacity at mid-span.
Configuration Capability Chart
Configuration Type | Acronym | Optimal Span Range | Relative Load Capacity |
|---|---|---|---|
Single Truss Single Story | SS | Up to 15m | Light to Medium |
Double Truss Single Story | DS | 15m to 30m | Medium to Heavy |
Triple Truss Single Story | TS | 30m to 45m | Heavy |
Double Truss Double Story | DD | 40m to 50m | Very Heavy |
Triple Truss Double Story | TD | 50m to 60m | Extreme Heavy Duty |
Single-Single (SS) or Double-Single (DS) setups work best for specific applications. They are optimal for short-to-medium spans. Typically, these span up to 30 meters efficiently. They comfortably handle standard commercial vehicle loads. You keep dead weight exceptionally low. Assembly remains exceptionally fast. Small teams can complete these builds quickly. They require minimal heavy lifting equipment.
Extreme live loads demand robust frameworks. Triple-Single (TS), Triple-Double (TD), and chord-reinforced setups (QSR) handle intense stresses. These are strictly required for maximum single spans up to 60 meters. Heavy military transport necessitates these heavier configurations. Mining dump trucks require multiple reinforced chords. The multiple trusses distribute sheer forces across a wider footprint.
Dead load trade-offs present a constant engineering reality. Heavier, multi-story configurations drastically increase the structure's self-weight. This internal weight ultimately caps the maximum theoretical span. You cannot add panels infinitely. Diminishing returns occur as dead weight overtakes payload capacity. Engineers must calculate this equilibrium point precisely. Exceeding optimal weight ratios causes internal structural fatigue.
Live load classifications map the structure's capabilities to strict engineering requirements. They align perfectly with global frameworks like AASHTO HL-93 or Eurocode. You can configure the system for 40-ton to 120-ton payload vehicles. This flexibility suits everything from logging trucks to mining excavators. A Compact 200 Bailey Bridge meets these intense demands consistently. Standardized testing guarantees these classifications. You rely on proven mathematical models.
Dynamic impact factors complicate static load calculations. Moving vehicles generate additional stress continuously. High speeds increase impact forces directly on the steel decking. Heavy braking transfers severe horizontal loads into the transoms. Tracked vehicles stress the deck differently than wheeled trucks. You must account for these dynamic forces during the design phase. Steel cleats dig into surfaces aggressively. Rubber tires spread loads more evenly.
Deflection and camber management ensure long-term stability. Engineers build positive camber into the initial assembly intentionally. This upward curve counteracts inevitable live load deflection safely. As heavy trucks cross, the deck flattens momentarily. It springs back once the load passes completely. This active geometry maintains structural credibility under maximum stress. Camber prevents the span from sagging permanently.
Best practices for managing dynamic loads:
Enforce strict speed limits across the entire span length.
Limit heavy tracked vehicles to single-lane center crossings exclusively.
Inspect transom bolts routinely after high-impact braking events.
Apply anti-skid surface treatments to reduce horizontal braking forces.
Install approach ramps securely to minimize entry impact vibrations.
Massive point loads concentrate heavily at the bearing points. You absolutely need accurate geotechnical data beforehand. The reactions at the abutments are immense. They require substantial reinforced concrete or heavy grillage foundations. Weak soil will cause catastrophic settlement over time. Do not underestimate foundation bearing pressures. Engineers must analyze core soil samples. Geotechnical failures compromise the strongest steel structures.
Cantilever launching mechanics dictate your assembly space requirements. You typically need a launching bank 1.5 times the bridge length. Assembly crews push the structure across the gap using heavy rollers. You must calculate the launching nose weight precisely. The nose must reach the far bank before the center of gravity tips. Miscalculating this balance point risks losing the structure. You add counterweights to the tail section for safety.
Maintenance and fatigue monitoring dictate longevity. You must implement a realistic maintenance cycle for this steel truss bridge. High-traffic scenarios accelerate general wear. Monitor the main panel pins for abnormal abrasion. Conduct scheduled bolt torque checks on all transoms. Track anti-corrosion coatings carefully in humid or marine environments.
Critical maintenance checkpoints:
Check panel pins weekly for signs of shear deformation.
Verify sway brace tension monthly to prevent lateral sway.
Inspect the galvanized coating annually for rust penetration.
Re-torque deck bolts after the first hundred heavy crossings.
Time to deployment often drives the final structural decision entirely. Compare the rapid assembly times of modular systems against alternatives. Bespoke fabricated bridges require extended lead times consistently. You might wait months for custom steel fabrication. Modular panels arrive ready for immediate on-site assembly. A trained crew can launch a medium span in days. This speed prevents costly project delays. Rapid deployment keeps supply chains moving.
Evaluate temporary versus permanent application criteria carefully. You can utilize the system as a permanent structure safely. Permanent installations require specific environmental upgrades. You must specify anti-skid epoxy decking for civilian traffic. Higher-grade hot-dip galvanization is essential for decades of exposure. Temporary rental assets may only require standard paint. Choose the finish based on lifecycle needs.
Procurement and engineering teams must execute specific next-step actions. Gather precise site data immediately. You need the exact gap width measured accurately. Determine the maximum vehicle axle load expected. Test the bank soil bearing capacity thoroughly. Collect this critical data before engaging a manufacturer. Accurate data ensures proper design drawings. Guesswork leads to catastrophic structural failures.
These modular systems offer highly engineered solutions for complex access challenges. They require precise configuration matching based on exact span requirements. You cannot guess the panel arrangements safely. Load demands dictate the final structural geometry. Every component plays a vital role in load distribution.
We strongly advise engaging qualified structural engineers early in the design phase. They will validate your cantilever launching method rigorously. They ensure your abutment design handles the concentrated forces safely. Professional oversight prevents costly installation errors.
Request site-specific structural calculations from a certified supplier today. Ask for a customized load-span configuration matrix. This data will guarantee your project's success. Act now to secure your critical infrastructure pathway.
A: The absolute maximum clear span is approximately 60.96 meters (200 feet) without intermediate piers. Achieving this maximum length requires specific heavy-duty configurations. You must use reinforced setups, such as Triple-Double Reinforced (TDR). The final allowable span always depends on required live load limits and crossing vehicle types.
A: Yes, it can comfortably support 100-ton heavy equipment or tanks. However, this demands specific high-capacity setups. You will typically need a Triple-Truss Double-Story (TD) configuration. The bridge also requires custom heavy-duty transoms and reinforced decking to distribute immense track loads evenly across the structure.
A: Width dictates transom strength and overall structural weight. Standard single-lane setups offer 3.15m or 4.2m clear widths using standard transoms. Custom double-lane setups require significantly longer, heavier cross-girders. These larger girders increase the total dead load. Engineers must recalculate maximum spans when expanding the roadway width.
A: Standard heavy construction machinery handles primary lifting. However, the assembly relies on system-specific hardware. You need specialized heavy-duty panel rollers, launching noses, and standardized Bailey pins. Crews use specific structural wrenches and pin-driving mauls designed exclusively for these modular panels to ensure secure connections.
